• #
  • #
  • #
  • #

Samsung Galaxy Note 3 rumored to have 4K video capture

Penulis : Pada Hari : Tuesday, August 27, 2013 | Jam : 5:40 PM
The forthcoming phablet could be the first mobile device to offer Ultra High Definition video recording in 4K resolution, but we think that's a long shot.

The forthcoming Samsung Galaxy Note 3 could be the first smartphone to boast Ultra High Definition video recording, reports The Korea Economic Daily (translate).
With only days left before the expected official IFA announcement, new rumors like this have bubbled to the surface.

According to the Korean news outlet, the phablet will be the first to offer 4K (3,840x2,160-pixel) video capture. What's more, the device is alleged to provide 24-bit/192KHz music playback, a step above the 16-bit audio found in previous generations.
While the Ultra HD video sounds fantastic, it's worth noting that there are currently no smartphones capable of playing back video at such a resolution. Going a step further, it's hard to imagine the Galaxy Note 3 having enough storage to hold said videos. It also isn't clear what the purpose of videos would be at such a high resolution, since 4K TV sets are still a long ways off from being the norm.
As one rumor that must be taken with not just a grain, but a handful of salt, I am reminded of the 3D display and video recording fad from a few years back. Remember how smartphones were going to spur the adoption of 3D televisions? Now, consider that a recently reduced rate Samsung TV can still cost $4,999. Recording 4K video on a mobile device seems like a feature that would be wasted on most users.
Read More » No comments
Use NetLive for Android to find data-hogging apps in real-time
Ready to find out which app is eating all of your data each time it's running? NetLive knows exactly how much data your other apps are using right now.

As Sharon Vaknin recently pointed out, unlimited data plans are in short supply. You may have a 2GB or 4GB data limit because the next package up is either too much data, or doesn't fit in your budget. However, that doesn't mean you shouldn't be able to enjoy your smartphone to the fullest.
One of the first things you should do on a limited data plan is find ways to conserve data. But what if you've followed all the tips for saving data, and you still seem to be running out too quickly? There may be a data-hogging culprit in your mix of apps.
NetLive is an Android app that will show you data usage in real-time, so you can see what's really hogging your data plan. The way this app differs from the built-in data manager and other data reporting apps is the real-time feature. For instance, if you use Facebook, Gmail, and Pandora more often than other apps, they will undoubtedly be at the top of your list. But what if another app you don't use that often keeps running in the background and pilfering your data allowance? Ready to check it out? Here's how to get started:

First, install a copy of NetLive on your Android device. The app requires Android version 4.0 or higher. Open the app and select the unit of measure for viewing data usage. For starters, I'd recommend setting this to kBps.

It's time to decide if you want the data usage information shown in the notification shade, in a widget on your Home screen, or both. The widget has sizing options (from micro to large), unit of measure options, and even text color choices so you can read it on your wallpaper. If you're using the widget, you can disable the notification shade information from the app's menu.
 
Now you can start using your phone as usual, and whenever you're curious how much data is being used at the present time, open the notification shade or check the widget. The app using the most data, and its current transfer rate, will be displayed.

Read More » No comments

The complete guide to using SwiftKey on Android

Penulis : Pada Hari : | Jam : 5:14 PM
The complete guide to using SwiftKey on Android
Learn how to use the world's best Android keyboard in a few short minutes.


One of the advantages of using an Android device is having the ability to change the default browser, keyboard, and messaging apps, among other things. Google's operating system gives the user complete control of their device.
The Google Play store is home to thousands of different apps, but there is one that stands out from the pack and ranks among the very best. SwiftKey, a popular third-party keyboard, is arguably the best Android keyboard available today. While Google has made strides to improve the stock Android keyboard, SwiftKey's customization features and prediction engine are unmatched.
Here's how you can become a SwiftKey master:

Getting started

Installing the app
SwiftKey is available in the Google Play store for $3.99, a rather steep price for a keyboard; however a trial version is available for free for 30 days, which should be more than enough time to get you hooked.

The first time you open the application you will be prompted to choose your language, make SwiftKey your default keyboard, and enable SwiftKey Cloud and SwiftKey Flow.
SwiftKey Cloud
Switching between devices used to be a hassle when using SwiftKey. After listening to its users, however, the company recently updated the app to now save your settings in the cloud. That isn't all it can do, though. SwiftKey Cloud can also add trending phrases to your dictionary and learn about your typing habits from other applications such as Twitter, Facebook, and Gmail.
 
Assuming you didn't already enable the cloud feature during the SwiftKey setup. The app can be configured by going to your phone's Settings and selecting the Language & Input option under the Personal settings. Next, ensure SwiftKey is enabled and set as your default keyboard, click on the settings icon, and open the SwiftKey Cloud option.
Here you will be able to enable, disable, and manage SwiftKey's syncing behavior, check other devices you have connected to the cloud, access the Facebook and Twitter personalization settings, enable or disable Trending Phases, and delete your cloud account.

The Keyboard

Making it your own
The customization tools included in SwiftKey are nearly endless. There is support for 60 different languages, six keyboards, and 11 themes. Other options include the ability to change the vibration duration on keystrokes, add accented characters to letters, customize long-press speed, enabling arrows for navigating the interface, and changing the functionality of the spacebar.
Changing your keyboard
The traditional QWERTY keyboard is enabled by default, but if you are feeling adventurous you can choose from AZERTY, Colemak, Dvorak, QWERTZ, and QZERTY keyboards. To do this, open the SwiftKey settings and select Languages. Under your selected language will be the name of your current keyboard and a small keyboard icon, click the icon, and choose your new keyboard. You can also change your language from this screen, SwiftKey allows for up to three languages to be installed at one time.
 
Choosing a theme
Now it's time to customize your keyboard to make it more appealing and personal. Open the Theme & Layout option in the SwiftKey settings, here you will be able to change your theme and add special features to your keyboard. The 12 themes to choose from are Cobalt, Pitch, Dusk, Regal, Berry, Sky, Fuchsia, Holo, Dark, Light, Neon, and Pumpkin.
These settings will also give you the opportunity to add another row at the bottom of the keyboard with arrow keys to help when you have to go back and delete a word. Other options included the ability to enable accented characters when long-pressing keys, splitting the keyboard while in landscape, and adjusting the keyboard's height.
Adjusting sounds and vibrations
Typing on a virtual keyboard can be a difficult adjustment for some. Luckily, SwiftKey, like many other keyboards, has an option to enable sounds or vibrations when you press a key. The app takes it one step further, however, giving users the ability to customize the volume of a keypress and duration of the vibration. 
Adjusting the sounds can be done inside of the SwiftKey settings by entering the Sounds & Vibration option.
Setting up the spacebar
Venturing into the Advanced settings will reveal even more options to customize SwiftKey, including changing the functionality of the spacebar, enabling quick periods, and more.
The SwiftKey spacebar can be configured to do one of three things: inserting a space, completing the current word, or inserting a prediction.
Other options that can be enabled include inserting a period with a double tab of the spacebar, or automatically capitalizing sentences.
The Advanced settings will also allow you to adjust the duration of long-presses on keys, enable or disable notifications that contain tips and achievements, and wipe SwiftKey data from the device.

Using Swiftkey

Choosing your Input method
There are quite a few input methods in SwiftKey. You can choose between traditional typing on the keyboard, using your voice, or a gesture method known as Swiftkey Flow. The method, which debuted in the keyboard this past February, is similar to the gesture-based typing feature found in Google's keyboard and third-party competitor Swype. Without lifting a finger, users can swipe over letters to complete a word.
 
The gesture and voice methods can both be enabled in the Input Method option in the SwiftKey settings.
Getting to know gestures
Outside of the keyboard's Flow feature, SwiftKey also supports various gestures to speed up the typing process. You may have not been aware that you can swipe back on the keyboard to quickly delete the last word you typed, and also swipe down to hide the keyboard. Both of these gestures are enabled by default, but they can only be used when SwiftKey Flow is disabled.
Using the SwiftKey dictionary
SwiftKey's built-in dictionary will learn words from your social networks, e-mail, and text messages. It can also pull names from these accounts, along with information from your smartphone's contacts list.
Words can be manually added to the dictionary in the prediction be at the top of the keyboard. Simply type the word you would like to add and select it in the prediction bar, or press the spacebar. Deleting a word from the dictionary can be done by tapping and holding the word as it appears at the top of the keyboard and choosing the "Remove" option.
Check your efficiency
Swiftkey keeps track of everything you do and will report back to you with detailed information that shows how it has made you a more efficient typist. You can check your typing efficiency, distanced flowed, keystrokes saved, typos corrected, words flowed, words predicted, and words completed.
One of the coolest features is the typing heat map, which shows which letters you use the most.
Updates
Swiftkey is constantly updating its app and pushing out new features, such as support for more languages, improved predictions, and added capabilities. The one-time app purchase will take you a long way and improve typing on your Android device for years to come.
Read More » No comments

A Guide to Making Your Android’s Battery Last a Little Longer

Penulis : Pada Hari : Sunday, August 25, 2013 | Jam : 11:39 PM

A common complaint among Android users is short battery life. As we all now, Google’s platform has numerous benefits, but state-of-the-art features and constantly being connected seem to come with one drawback: comparatively large battery consumption.
I don’t suggest that you should stop taking advantage of the things that make Android great, such as streaming music players that allow you to walk around with millions of songs in your pocket, location-aware apps, background updates or all the wireless options. Still, if you’re frustrated by how often you need to connect your charger, it’s good to know what types of apps and activities that eat the most battery, so you can make an active decision whether or not it’s worth the extra juice.

Use the GPS Wisely

The GPS uses the battery like there’s no tomorrow. Location-aware software is one of Android’s many fortes, but they can be real battery drainers. The Power control widget is useful for switching the GPS on and off, and you should keep an eye on your notification bar: an icon will appear whenever the GPS is activated.
The GPS icon in the notification bar

Turn off Bluetooth When You’re Not Using It

Perhaps an obvious tip, but it’s best to disable Bluetooth whenever you’re not actually using it. The quickest way to switch Bluetooth off and on is via a widget on your homescreen.
Bluetooth button on the Power control widget

Disable Wireless Network Positioning

When your device learns your location via wireless network triangulation, it requires less battery than if it had used the GPS. But using both methods simultaneously will of course use the most power. The GPS can handle location tasks by itself, albeit a bit slower. Also, wireless network positioning is used to gather anonymous Google location data in the background, which will drain the battery further. You can turn it off from Settings > Location > Use wireless networks.
Disable wireless network positioning

Switch off Wi-Fi, or Keep it Always On

If you’re close to a reliable WLAN during the better part of the day, having Wi-Fi always turned on may be favorable from a battery point of view, since the Wi-Fi radio uses less battery than the 3G radio. And when Wi-Fi is on, 3G is off. You can confirm Wi-Fi always stays on by going to Settings > Wireless networks > Wi-Fi Settings. Press the Menu button, tap on Advanced, Wi-Fi sleep policy and select the Never option.
On the other hand, if you’re not close to a strong Wi-Fi signal for extended periods of time, disable Wi-Fi from a homescreen widget or from Settings > Wireless networks > Wi-Fi.

Disable Always-On Mobile Data

The Always-On Mobile Data option is on by default, and can be disabled from Settings > Wireless & networks > Mobile networks > Enable always-on mobile data. It allows your phone to be connected non-stop, but does it need to be? I have disabled the setting, and I still get push Gmail and even Google Talk seems to perform as usual, as well as the few apps I have that use automatic updates. However, if you have a lot of apps that regularly connect to the Internet, disabling this option may actually be a bad idea, since turning the data connection on and off will require more energy than simply having it on all the time.
The Always-on mobile data setting

Kill 3G if Your Phone Often Struggles to Find It

When your Android attempts to decide which signal to lock on to, it strains your battery. If your phone often switches between GSM and 3G in your area, it can be preferable to simply disable 3G altogether, and hence abolishing the need for your phone to try and find a suitable network. Go to Settings > Wireless & networks > Mobile networks > Network mode > GSM only.

Use a Quick Screen Timeout

After a certain time of inactivity, your screen is automatically turned off, and that’s the Screen Timeout. To use such a low value as 15 seconds can be annoying, but one minute is on the other hand likely too long. I use 30 seconds. You can alter this option from Settings > Screen & display > Screen timeout.

Turn Down the Screen Brightness

Android’s Automatic brightness (Settings > Screen & display > Brightness) setting is recommended. If your phone doesn’t have this option, set a reasonable value at roughly 30 % and see if that suits you.
Use the Automatic brightness options

Live Wallpapers Will Use More Power than a Static Background

Oh yes, live wallpapers can be awesome. But they will obviously use precious battery juice, albeit evidently not as much as one could think, talking the eye-candy into consideration and what they can do.

Have an AMOLED Display? A Dark Wallpaper Will Spare the Battery

When having dark backgrounds, phones with AMOLED display will use less power, because each pixel on OLED screens is photoemissive and will actually generate its own light. Since there’s no need for a backlight, the pixel can essentially turn off its light source and go total black. As a result, you can save a teeny-weeny bit of energy by having a dark or black background on AMOLED screens.

Use Widgets Wisely

A few days ago, we mentioned 10 cool homescreen widgets, and it’s great that Android supports them. Most widgets will only have a negligible effect on your battery life, but those that automatically pull info from the interwebs can be power hogs.

Use Reasonable Intervals for Automatic Updates

I personally don’t need to have automatic updates on my phone, except for emails that I want to be notified of the moment they arrive. I prefer launching the apps at my convenience and see what’s new. Most applications that connect to the Internet have an option to update upon launch, and that’s all I need. By lowering the update intervals, or by even turning them off completely, you can definitely make your battery last longer. I recommend that you reduce them to your own minimum values.
If you have an Android phone with HTC Sense, you can make sure the HTC Mail Client, the HTC Weather App, Facebook, Flickr, Stocks and Twitter update themselves as often as you want them to. This is mainly done from Settings > Accounts & sync. It’s also a good idea to look over third-party apps that grab data from the Internet, particularly the official Facebook app and the various Twitter apps, since they usually have background updates on by default.
Accounts & sync

Streaming Apps Will Use a Lot of Battery

In a recent Droid vs Droid special, Andrew did a rundown of music streaming apps, and I certainly don’t think you should avoid this type of application on your phone. But bear in mind that software that stream audio and similar apps will use plenty of power.

Learn What’s Been Drinking the Juice

Unless you have the doubtful pleasure of still running Cupcake, you can check out a built-in Android feature that tells you precisely how much your apps use the battery. You can then start using battery drainers less often, or simply uninstall them. Go to Settings > About phone > Battery > Battery use and press the items in the list for further info. You can also use JuicePlotter to analyze usage patterns.
Android's battery use screen
Read More » No comments
Sony Xperia L Best Review

Occupying the bottom rung of Sony's current Xperia line of smartphones, the $299 Xperia L has attractive styling for an entry-level handset. The device also packs a colorful 4.3-inch screen, dual-core processing, and a decent camera. If you're expecting much more from this affordable unlocked phone, though, you'll be headed for a rude awakening.

Core components
A Sony flagship the Xperia L isn't. Unlike its bigger and badder siblings, the Xperia ZL and Xperia Z, the Xperia L relies on a selection of watered-down components to get through the day. Under the hood you'll find a slow 1.2GHz dual-core processor paired with a constrained 1GB of RAM.
The phone's internal storage is also cramped, topping out at 4GB. Thankfully you can add extra in a pinch via the Xperia L's microSD card slot. You'll just have to be mindful when you install apps or transfer digital media.

Keeping everything charged up is a 1,750mAh battery, which frankly is a bit on the skimpy side. Many newer smartphones, even compact ones such as the Motorola Moto X, come with power sources in capacities of 2,000mAh and upward.
Design
Thankfully Sony didn't skimp on effort and materials when designing the Xperia L. By the looks of it you'd probably never guess this was a budget handset. Its curved back makes it comfortable to hold and the Xperia's matte-black finish paired with silver highlights conveys a distinct sense of elegance.
Measuring 128mm tall by 65mm wide by 9.7mm thick (5 inches by 2.6 inches by 0.38 inch), the Xperia Z may not be the sveltest phone money can buy. That said, the device's dimensions are compact enough to slide into tight pockets without much consternation. Ports on the Xperia are the typical Micro-USB slot and 3.5mm headphone jack, plus it has a large silver power button and a dedicated camera key.
The Xperia L's LCD screen spans a sizable 4.3 inches across but has a relatively low resolution (854x480 pixels). Still, while it can't match the sharpness of other handsets with HD displays, it should be colorful enough for viewing basic mobile content.

Software and interface
The Xperia L doesn't have the freshest software either, running the now-outdated version 4.1.2 of Android Jelly Bean. The current iteration, Android 4.3, boasts quite a number of enhancements but has made it to only a select number of devices.
As with its other phones, Sony layers its own software skin over the Xperia L's Android OS. Along with useful tweaks like the customizable app tray, the photo and video galleries are Sony's own creations. You also find apps for diving into the company's Music and Video Unlimited entertainment storefronts.
Camera
Sony loves to make a lot of noise about its smartphone cameras, and the Xperia L is no exception. Equipped with an 8MP sensor, though, the handset is less sensitive than its more expensive siblings the Xperia Z and ZL, which boast a sharper 13MP imaging system.

Outlook
If you're committed to the Sony brand and perhaps the company's online roster of digital entertainment, the $299 Xperia L might be worth a look. That's especially true if you're also on the hunt for an affordable unlocked Android phone. Its unimpressive specs and dated software, however, make it hard to recommend to everyone else. A better buy is the tried and true $299 (unlocked) LG Nexus 4, which for the same price trumps the Xperia in practically every other important area: components, Android software, and display.

Read More » No comments

How to Install Android 4.3 Jelly Bean on Samsung Galaxy S750

Samsung Galaxy S7500 can now be updated to Android CyanogenMod 4.3 Jelly Bean via a custom rom. This is a new Nightly experience stock Android 4.3 jelly Bean on your Samsung Galaxy S7500 with this custom firmware. But please take care that this is an Nightly rom which means it’s under development stage and it might have some bugs and this is a custom ROM not any Google or manufacturer official firmware, so please do make sure your device is rooted.

In this tutorial we will guide you through how to update your Samsung Galaxy S7500 to Android 4.3 Jelly Bean Official Nightly Custom Firmware. If you want to install CM4.2 ROM Jelly Bean 4.3 on Samsung Galaxy S7500 then you can follow the instructions below
Note: This Rom Not at available at this time (Please Waite updated coming soon)
Disclaimer: The procedure given in this tutorial is considered as risky and may cause damage to your phone. It is recommended that you should not follow it unless you are familiar with these things. Follow this guide completely at your own risk.

I. Before You Begin:
1. The following procedure works for Samsung Galaxy S7500 only.
2. Make sure your device have at least 80% battery power.
3. Make sure USB Debugging is enabled
4. Make sure your device must ClockworkMod Recovery (CWM) installed

II. Downloading Required Files:
1. Android 4.3 CM4.2 ROM
2. Google Apps

III. Install Android 4.3 CM4.2 Jelly Bean on Samsung Galaxy S7500
1. Download Android 4.3 CyanogenMod 4.2 ROM for Samsung Galaxy S7500 and also download Google Apps on computer.
2. Connect the Samsung Galaxy S7500 to computer via USB cable.
3. Copy the downloaded firmware zip to the root folder on device’s SD card.
4. Disconnect the Samsung Galaxy S7500 from computer and then Power it off
5. Boot the Samsung Galaxy S7500 into recovery mode by pressing and holding Volume DownPower buttons together.
Note: In recovery mode, use Volume buttons to navigate between options and Power button to select the desired option.
6. In recovery mode first a Nandroid backup of the existing ROM.
A Nandroid backup, select Backup and Restore then select Backup again on the next screen. When backup is completed return to the main recovery menu.
7. Select wipe data/factory reset then select Yes on the next screen to confirm the action.
8. Then select wipe cache partition and after the wiping process completes select Wipe Dalvik Cache under advance option. Once the wiping process is done, return to the recovery menu.
9. Select Install Zip from SD card then select Choose Zip from SD card. Now locate the Android 4.3 CyanogenMod 4.2 ROM zip which was earlier copied to the Device’s SD card. Hit the Power button to select it and confirm installation on next screen.
4.   Once the installation process is complete, return to the main recovery menu and hit Reboot System Now. 
The Samsung Galaxy S7500 should now be successfully updated with Android 4.3 CyanogenMod 4.2 ROM. Navigate to Menu Settings About Tablet  Software info to verify the new firmware installed.
NOTE: To go back to the previous ROM in Step 6, boot the tablet into recovery mode. Then select Backup and Restore and restore the ROM by selecting it from the list.
Read More » No comments

How to use the HTC One to control your TV

Penulis : Pada Hari : | Jam : 11:12 PM

How to use the HTC One to control your TV

The HTC One smartphone can control your TV, tell you what's playing, and even recommend new shows for you to watch. Here's how to set it up.

Phones these days can be used for more than making calls. In an effort to compete and stay relevant in an increasingly crowded market, smartphone manufacturers are incorporating more features into their devices. One feature that is gaining traction is the inclusion of an IR blaster, which can be used to transform a smartphone into a universal remote.
We already told you how to use the IR blaster in the Galaxy S4, however you may not have been aware that another high-end Android smartphone also includes the technology. The HTC One running the company's Sense 5 user interface includes an IR blaster, along with remote control and recommendation software that can enhance your TV experience.
Here's how you can set up the HTC One to control your TV and more:

Getting started
 
Setting up the application is a long and tedious process. Start out by launching the TV application that comes preloaded on the device. You will be asked to provide your location, TV provider, and specific channels you receive, along with other video services you may subscribe to like Hulu Plus. Next, you will be given the opportunity to select your favorite shows, which will help HTC recommend similar programs and let you know when your favorite ones are playing. 

Connecting the HTC One to your TV
 
Click the remote icon located at the top of the TV app, select the Start option, and choose which components you want the HTC One to control: your TV, cable box, or home theater system. Next, select your TV brand and follow the steps the app provides to set up your device. 

Each TV, cable box, and home theater system is different. Some will automatically sync with your HTC One, while others will require you to perform additional steps to configure your device.

HTC included support for a majority of manufacturers in the Sense TV app. In the rare case that your TV isn't listed, however, there is also an option to manually set up your device.
To do this, select the "Manufacturer not listed" option and manually enter your TV's brand. At this point you will be asked to point your TV's remote at the IR blaster in the HTC One, which is located at the top of the device behind the power button, and perform a variety of tasks, such as holding down the Power, Mute, Volume, and Input buttons to program the remote.
You will then be asked to select your cable box brand. This will allow you to change the channels on the TV and control the DVR using only your HTC One. As I mentioned above, every cable box is different; those from Verizon and Direct TV will automatically sync with your device, while boxes from Samsung and AT&T will require additional steps.
The last item on the list will be setting up the HTC One to control your home theater system. Depending on the specific brand, you will be asked to perform different tasks, such as powering the system on and raising the volume.
Your HTC One should now be able to power on your TV, change the settings, control the volume, and switch between channels. I found the HTC One's IR blaster to have exceptional range, it even worked when it wasn't pointed directly at the TV or cable box.
Getting to know Sense TV
 
The Sense TV software is extremely powerful. It provides detailed information on TV shows and movies, and gives you the ability to easily switch between them. The app provides complete TV schedules through the channel guide and includes built-in notifications to ensure that you never miss your favorite shows again.
The first time you enter the app you will be greeted with a list of recommended shows that are currently playing or coming up next. A drop-down menu at the top left-hand corner of the screen lets you to choose between different movies, TV programs, sports, and a channel guide. There is also a social tab that will display what your friends on social-media networks are watching.
 
Scrolling to the right will reveal upcoming shows, videos stored locally on your device, and your scheduled reminders. Clicking on a show or a movie will provide a summary, along with information on upcoming episodes, a share feature, and even when a specific episode will be playing.
Perhaps one of the most useful features is being able to quickly access TV controls from the HTC One's notification bar. A simple swipe of the finger will allow you to mute the volume, switch to a new show, access the full remote, or power off the TV.
 
The HTC One and Sense TV offer an enjoyable experience. However, the app doesn't offer support for features like Netflix integration, something the Galaxy S4's competing Watch On app includes.


Read More » No comments
Last week, Punit Soni (Motorola’s VP of Product Management) told us that we were “days” away from the arrival of Developer Editions and other carrier models of the Moto X. Yesterday, Motorola updated their Moto X “ways to buy” page, showing off the new Developer Edition, which will sport a black front panel coupled with a white woven rear back plate. The render of the phone also shows the words “DEVELOPER EDITION” engraved on the bottom.

The company says the phone will have “of course” an unlockable bootloader, but reminds you in footnotes that unlocking the bootloader of the phone “voids all warranties and may cause serious harm to your device.”

The page mentions that the dev edition will “have a look all its own,” meaning the two-tone color scheme is something different than what you’ll find in carrier models. Now, once MotoMaker is fully opened up or should you buy a Moto X card from AT&T, you could essentially build a similar looking device.

The listing also confirms 32GB of storage and an unlockable bootloader. No price is listed just yet, but since the AT&T 32GB model runs $629, I’d be surprised if it was lower.

As we said before, the phone can be already ordered from AT&T, with MotoMaker customization support coming soon. Other U.S. carriers including Verizon, Sprint and U.S. Cellular will also have the device in stores soon.
Read More » No comments

Motorola Moto X review: A comfy Android with mass appeal 


The good: The Motorola Moto X squeezes a speedy camera and futuristic voice command capabilities into a well-crafted design that hits the sweet spot between screen size and comfort. The phone has great battery life and is available in an endless variety of customized designs.

The bad: With no expandable storage, space could get tight, especially on the 16GB base model. The screen isn't as big and sharp as those on some competing handsets.

The bottom line: While in screen quality and storage capacity it lags behind rival superphones, the Moto X's superbly compact and comfortable design, whiz-bang voice controls, and long battery life make it a worthy Android contender.

To put it bluntly, Motorola has never created a true flagship ubersmartphone on the level of the Samsung Galaxy S4 and HTC One. But the company aims to change that with the Moto X. The $199 smartphone is Motorola's first handset fully developed under the auspices of its corporate parent (and Android godfather), Google. And it'll be available on most major U.S. carriers when it hits stores later in August.
Make no mistake; the Moto X isn't a fire-breathing mobile monster that will blow away the competitors in a spec sheet battle -- the screen isn't cutting-edge, and there's no expandable storage. Storage is the phone's biggest weakness: with just 16GB in the $199 model (the 32GB Moto costs $50 more) and no SD card slot for adding more, it's got an uphill battle on the value scale versus the HTC One (32GB by default) and Galaxy S4 (expansion slot onboard).
Storage qualms notwithstanding, though, the X is a nimble, compact handset with advanced capabilities that targets ordinary phone users. The Moto X boasts many of the same features that Motorola's new trio of Verizon Droids flaunt -- especially always-on Google Now voice control -- plus a few slick extras. Better yet, they're all crammed into a highly customizable design built for maximum comfort. This is a scrappy smartphone with enough going for it to bring the fight to the big boys.

A more thoughtful design
Under the thumb of Verizon's macho Droid brand for years, Motorola's smartphone industrial design has been well, industrial. Ever since the original Droid device hit the scene, Motorola has cranked out flagship machines sporting sharp angles, Kevlar coatings, and hard metallic trims.

To be fair, that's not a bad thing; those devices have been very popular. Plus the company's upcoming Droid mobile machines are less stark than their predecessors, featuring smoother curves and no metallic highlights. All three devices, though, the Droid Mini, the Droid Ultra, and the Droid Maxx, keep the traditionally aggressive red or sober black color scheme that's in keeping with Verizon's intimidating robotic franchise.

Motorola Moto X
The Moto X's compact, contoured shape makes it easy to hold.

The Moto X, however, pushes this history aside and attempts to turn an all-new page and gain broader appeal. Instead of harshly chiseled lines, the Moto X is sculpted with softly rounded curves. The phone's back is gently rounded for a more comfortable grip. It's an approach many hardware makers are taking these days, including HTC with its One and One Mini. The Galaxy S4 handset is also similarly contoured, but unlike Samsung's slippery, smudge-prone runaway hit, the Moto X has a textured soft-touch finish.
Motorola takes this contoured design a step further, shaping the back of the Moto X with left and right edges that slope at a sharper angle than the middle of the device. Motorola claims that this careful molding fits your hand better than a simpler uniform arc. The handset even uses a specially formed battery (2,200mAh, embedded) to match the Moto X's unique curvature.
Motorola Moto X
The bottom is sloped more steeply at the edges.

I have to admit that when I picked up Motorola's latest creation, it felt pretty damn good, its rounded frame fitting my fingers and palm like a glove. While I experience a similar reaction when I grip the HTC One, the Moto X's contours and solid chassis exude just as much quality and luxury to me. I also like how the phone's soft-touch backing wicks away moisture and fingerprints and has an almost metallic rigidity.
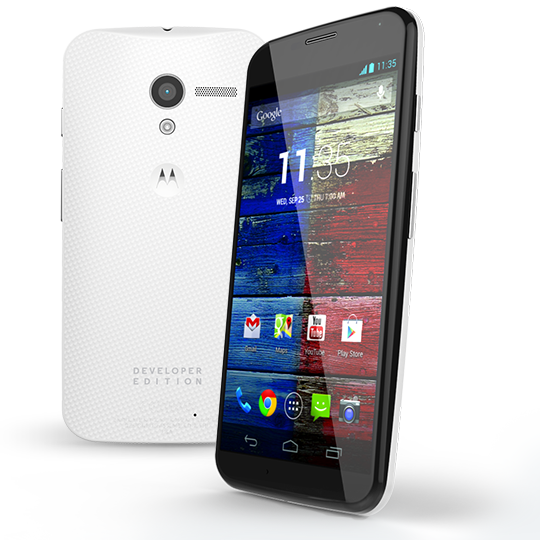
Choose from multiple colors and patterns for your Moto X.

These colors don't run
A huge part of the Moto X's design story is its made-in-America (or at least designed-and-assembled-in) moniker. As Motorola has explained earlier, it will design, engineer, and construct all Moto X units in the United States; Fort Worth, Texas, to be precise.
Consumers will have a choice of two basic colors to choose from when purchasing a new Moto X handset, white and black. Motorola, however, will offer buyers the option to personalize their phones with custom hues, patterns, and engravings crafted to order at Motorola's new Texas factory.
Motorola Moto X
The back of the Moto X uses a premium soft-touch finish.

These tweaking options, done through the Moto Maker online studio, include two front colors, 18 on the back, and seven accents. Motorola claims that this variety allows for thousands of permutations. There will even be custom wallpaper designs and cases to gussy up your device with. And thanks to the plant's Fort Worth location, shoppers who order the gadget can expect it to hit their doorstep within four days. Be advised that Moto Maker will be available for AT&T versions of the Moto X exclusively, at least at first.
Screen
In many respects the Moto X's display is a step down compared with what you get from the latest crop of premium smartphones. Competing devices such as the Sony Xperia Z, HTC One, and Samsung Galaxy S4 all have screens of 4.7 inches or larger. These gadgets also flaunt displays with full-HD resolutions (1,920x1,080 pixels), translating into massive views that still manage to offer high pixel densities.
By contrast the Moto X's 4.7-inch 720p (1,280 by 720 pixels) OLED screen, while no doubt large, doesn't serve up quite the same level of sharpness as HTC's and Samsung's mobile hot rods. I must stress, though, that unless you've had bionic eye implants or carry a jeweler's loupe, you probably won't pick up on any lack of detail. Additionally, the Moto X's OLED screen technology produces vivid colors, deep blacks, and wide viewing angles.
Of course a display's impact isn't based on just resolution, brightness, and color quality. Case in point: the Moto X's screen has an extremely thin bezel that lovingly hugs the front edges of the handset. Similar to those found on last year's Droid Razr M and the company's newly announced Droids, this helps the Moto X's display appear larger than life and command your attention.
Motorola Moto X
It's not superthin but it sure is compact.

Core components
Motorola calls the engine that propels the new Moto X its X8 Mobile Computing System, the same electronics under the hood of its new Droids. Claimed to include eight distinct processing cores, the system sure sounds impressive. When you break it all down, though, the X8 essentially is really just a souped-up 1.7GHz dual-core Qualcomm S4 Pro processor paired with quad-core Adreno 320 graphics.
To bring the core count up to eight, Motorola also throws in two additional low-power processing centers, one for contextual computing and another for analyzing spoken language. OK, so this may help the Moto X's total "core" tally reach the magic number, but I'm sure I'm not alone in crying foul.
When I think of numerous CPU cores, I envision multiple electronic brains of equal power and speed working in unison to tackle every smartphone task. Since not all of the X8's cores are created equal and they are relegated to specific tasks (all but two outside of general number-crunching), the Moto X is no true octa-core phone in my book.
That said, its power is nothing to sneeze at, either. The question remains how it'll compare with handsets with faster quad-core Snapdragon 600 chips. Hopefully the Moto X's 2GB allotment of RAM will keep the performance gap from being too great.
The Moto X runs Android 4.2.2, not version 4.3.

Software and interface
Given that the Moto X was born of the union between Motorola and Google, I was surprised to learn that it doesn't come with the freshest flavor of Android Jelly Bean (version 4.3). Rather, the phone runs Android 4.2.2 Jelly Bean. That said, Motorola has teamed up with Google to add plenty of neat tricks, the most notable of which is contextual computing, which the company refers to as "Touchless Control."
That's really a fancy way of saying that the phone runs a low-power microphone in the background with an ear continually trained on your voice. Just as with the new Motorola Droid Mini, Ultra, and Maxx, speaking a magic phrase at your Moto X tells the device to fire up the Google Now information app.
Speak, and the Moto X does your bidding.

In the Moto X's case, to begin you say, "OK, Google Now." From there you can ask a number of questions to find your current location, the weather, sports scores, and the answers to other queries. You can also tell the Moto X to set up reminders in your calendar, and initiate calls, texts, and e-mails a la Siri -- except you don't have to press a button.
The Moto X always has an ear out for your commands.

Aside from these slick voice capabilities, the Moto X's interface essentially remains the same as stock Jelly Bean. The five home screens, application tray, and widgets are pretty much identical to what you'd see on Google-approved machines such as the LG Nexus 4 and the Google Play Editions of the HTC One and Samsung Galaxy S4.
There are some slight yet important differences, though. The Moto X will softly pulse important notifications and alerts on the screen, even when asleep, as they occur. Motorola says this will help users conserve battery life since the phone won't have to power up the display each time the notification light flashes. Holding your finger on the center of the screen (and notification) causes the Moto X to display additional details for the alert. Dragging your finger upward takes you directly to the corresponding message if you decide more action is required.
Motorola Moto X
In our hands the Moto X proved to be a good listener.

Camera
What follows are our first impressions of the camera quality of the Moto X; we'll continue to update as we shoot more photos.
Apparently Motorola has finally taken camera capabilities seriously. Imaging has been an ongoing weakness of the company's handsets, but it's clear the Moto X is intended to address this deficiency. Motorola says its new device, equipped with a 10-megapixel "Clear Pixel" RGBC sensor and LED flash, can snap pictures with speed, and can grab 75 percent more light than competing smartphone cameras. That results in lower shutter times and clearer images under dark conditions.

Performance
I confess I'm pretty impressed with the Moto X's handling despite its dual-core processor. The phone feels very lively and responsive whether flipping through Android's menus and home screens or when launching apps. After subjecting the device to my usual gauntlet of benchmarks, I've found my results so far back up my impressions.

Moto X
The Moto X is quick but not crazy-fast.

The Moto X notched a Quadrant score of 8,519, which, though not as high as the astronomical scores the HTC One (12,194) and Samsung Galaxy S4 (11,381) garnered, is still respectable.

Call quality
I tested the Moto X on Verizon's CDMA network in New York and enjoyed good but not outstanding call quality. People I dialed with the handset described my voice as clear and loud, but flat and lacking warmth. They also noticed some clipping and dips in volume, especially at the beginning and ends of sentences.
This could be due to the X's complex noise suppression and voice recognition system, which leans on three microphones and its X8 hardware, but that's just speculation on my part.
Spoken words came through the Moto X's earpiece with plenty of oomph on my end. In fact, I had to dial the loudness down or risk eardrum pain. Another bright spot was the speakerphone, which sounded virtually identical to a regular phone call to my callers and belted out lots of volume.

Data speeds
Motorola says that five U.S. carriers will sell the Moto X: AT&T, Sprint, T-Mobile, Verizon, and U.S. Cellular. My test unit, however, was a Verizon-branded device, so linked to Big Red's 4G LTE data network. I tested the phone in various locations in New York City, recording performance via Ookla's Speedtest.net app.
Download speeds I observed were satisfyingly quick, clocking in at an average of 10.1Mbps. Upload throughput was also not too shabby, reaching an average speed of 6.8Mbps. In my experience AT&T is still the king of smokin' LTE data numbers, at least in New York. I typically see average downloads breaking the 20Mbps and uploads in the midteens.
Moto X
Verizon's 4G LTE delivered speedy data.
Battery life
Run time doesn't seem to be a problem. I was able to get the Moto X to perform a preliminary run of the CNET Labs video battery drain benchmark. The handset happily hummed along for quite a while, playing our sample HD movie for 10 hours and 9 minutes before calling it quits.
This places the Moto X in good company as far longevity is concerned. The HTC One managed 9 hours and 37 minutes on the same test while the Samsung Galaxy S4 persevered for an even longer average of 10 hours and 30 minutes.
Where can you get the Moto X?
Motorola will also push its new device hard, pledging that its enticing gadget will be sold by five U.S. wireless providers (AT&T, Sprint, T-Mobile, Verizon, and U.S. Cellular) in addition to an unlocked model. Expect the device to hit stores in late August or early September for a suggested price of $199.99.

Conclusion
Motorola's most impressive handset yet certainly packs in plenty of notable capabilities and functionality. But it's worth noting, also, that hard-core Android enthusiasts and spec junkies likely won't find the Moto X awe-inspiring. The 4.7-inch AMOLED screen is "only" 720p, and the nonexpandable 16GB of storage in the $199 model is a stumbling block; big-time media hounds and app addicts will burn through that quickly. In the absence of an expansion slot (like the Galaxy S4 has), I would've preferred that Motorola delivered 32GB in the baseline model, just like the HTC One -- or that the company had priced the phone at closer to $149 instead.
That said, Motorola took an unconventional tack with this handset. Instead of the traditional tactic of beating potential customers over the head with powerful components and every feature under the sun, Motorola decided to cater to shoppers' softer side -- focusing on how they use their phones every day.
To that end, the Moto X succeeds. It packs a great camera, has swift enough performance to satisfy all but the most demanding Android fanboys, and offers battery life that goes the distance. Throw in its superb, compact design and the Moto X doesn't even need to woo potential customers with its fancy Buck Rogers voice-recognition skills. That's merely the sweet icing on a mighty tasty cake.


Read More » No comments

Tips and tricks for Motorola's new Droid smartphones
These tips will help you transfer your data, share information with friends, and use your new smartphone to the fullest.


Motorola delivered a punch with its new Droid smartphones. Partnering with Verizon Wireless, the company announced the Droid Mini, Droid Ultra, and Droid Maxx at a press event in New York City last month. All three handsets are equipped with Motorola's custom X8 Mobile Computing System, 720p displays, 2GB of RAM, and 10-megapixel rear cameras. Motorola isn't pushing the specs, however, but is instead focusing on the unique features it has bundled with the devices.
Here's a list of some of those features and instructions on how to use them:

1. Motorola Migrate
 
It can be a hassle when it comes time to transfer files from an old phone to a new one. Luckily, the new Droids come with Motorola Migrate, a tool that can seamlessly transfer media, call and text history, and SIM contacts from your old device to your new one.
To do this, launch the Motorola Migrate app that comes preloaded on your Droid smartphone and hit the next button until you see a QR code on your screen. Then, download the app from the Google Play store on your old device, open it, select Start, and simply scan the QR code. The process will take several minutes to complete and in the end you should have most, if not all, of your old files on your new smartphone. 

2. Droid Zap
Droid Zap is built directly into the new Droid smartphones and gives them the ability to wirelessly share photos and videos with other Android devices within 1,000 feet. Unlike other sharing methods that require NFC, Bluetooth, or a Wi-Fi Direct connection, Droid Zap utilizes your data connection to quickly share files with other users.
The feature does have its fair share of limitations, though. Any Android device can receive shared content through the Droid Zap app, but only the three new Droid smartphones can send items to other users.
Droid Zap can be enabled in the Settings menu, while non-Droid devices can download the free app from the Google Play store. To use the feature on a new Droid device, enter the gallery, select the image or video you would like to share, and perform an upward two-finger swipe gesture on the screen. To receive a Zap on one of the new Droids simply perform a downward two-finger swipe gesture; those with non-Droid devices will be required to perform the same gesture inside the Droid Zap app.
The feature is responsive, easy to use, and actually very useful. Zaps can even be locked in the Settings menu, requiring users on the receiving end to enter a randomized code to view the shared material. 

3. Motorola Connect
Another interesting feature is Motorola Connect, a Chrome extension that allows you to see incoming calls and text messages when you are away from your phone. Using only your computer, you are able to ignore calls, and read and respond to text messages. The setup is relatively simple: go to your phone's settings, select Active Notifications, and turn on the Motorola Connect feature. Next, download the Motorola Connect extension in the Chrome Web Store, log in with your Google account, and you should be good to go.
Motorola Connect is supported on the Moto X, the Droid Mini, the Droid Ultra, and the Droid Maxx. 

4. Wireless Display
There has been a lot of buzz about Chromecast, the $35 dongle that allows you to wirelessly stream content from your mobile device to a TV. You may not have been aware, however, that the Droid Mini, the Droid Ultra, and the Droid Maxx include their own TV-sharing capabilities. Using Motorola's Wireless Display integration, the three smartphones can stream content to Miracast-compatible HDTVs.
The Wireless Display setting can be accessed through the Droid Command Center, which is located on the left side of the home screen clock widget. Make sure you are on the same Wi-Fi network as your HDTV, then turn the Wireless Display feature on, and select your TV from the list.
Your entire screen will then be mirrored on the TV, giving you the ability to browse the Web, play games, listen to music, or cast movies from your device to the TV screen.

Read More » No comments

Video Comparison: New Nexus 7 Vs the Old Nexus 7

Penulis : Pada Hari : Saturday, August 24, 2013 | Jam : 6:07 PM
We've talked a lot lately about the new Nexus 7 and compared the new and old models on paper, but this week we tested the two side-by-side and made a comparison video. You can find the video below, and we've included the transcription here if streaming video is not your thing.

Asus has once again built the Google Nexus 7 and we just got one in the AndroidPIT office. The first thing you notice is how different the new tablet looks compared to last year's model. For starters the back of the tablet now has a nice smooth finish which looks much better compared to the old Nexus' textured back.
You'll also notice the addition of a rear-facing camera on the new Nexus 7, a 5 MP snapper that didn't appear on the old model at all. However, both devices have 1.2 MP front-facing cameras that perform equally poorly. The new Nexus 7 now has internal stereo speakers.

How about dimensions? The new Nexus 7 is a little bit smaller than the older model, just under 2 mm thinner and a fraction thinner in width. The screens however are the same size, although the new model packs in a wonderful 323 pixels per inch comapred to the older model which only had 216 ppi in the same area – that's a neat 1.5 times more pixels per inch in the new Nexus 7.
Speaking of resolution, the 2013 Nexus 7 has slightly better than Full HD resolution, with 1920 x 1200 pixels. Full HD is 1920 x 1080 pixels. Similarly the old Nexus 7 had slightly better than HD resolution, with 1280 x 800 pixels, whereas HD resolution is 1280 x 720. This ''additional'' resolution is due to the 16:9 aspect ratio of the Nexus 7's. In comparison, the iPad Mini has a 4:3 aspect ratio – this is basically the difference between widescreen tvs and traditional television sets.


Once we turn the devices on you can really see the difference in screens. The new Nexus 7 has a 7-inch, LED-backlit, LCD IPS touchscreen, and combined with the additional pixel density the results are pretty stunning. It's seriously bright in comparison. The new Nexus 7 also shipped with Android 4.3 straight out of the box, and one of the main features of 4.3 is that it includes OpenGL ES3.0 graphics as standard. The old Nexus 7 is upgradable to Android 4.3 but the older Nexus 7 has GeForce graphics compared to the new model's Adreno 320 chip and of course, a lower pixel count.


As for CPU's the new Nexus 7 has a quad-core Snapdragon S4 Pro which we discovered is actually a throttled back Snapdragon 600 processor. The new Nexus 7 CPU ticks at 1.5 GHz whereas the Snapdragon 600 is capable of 1.7 GHz. In comparison the older model has a quad-core Asus Tegra 3 chip running at 1.2 GHz. So there's certainly a lot more speed available in the newer device. The new Nexus 7 also ships with 2 GB RAM.
Scrolling through the app pages it's easy to see the difference in lag time and smoothness between the new and old Nexus 7. We should note too that the new Nexus 7 comes with Google Play Games and Play Textbooks pre-installed. And considering the print-resolution display, the new Nexus 7 can certainly compete as an e-book reader – something Google mentioned during the launch of the device.
One of the interesting features of Android 4.3 is multi-user profiles that the device owner can apply restrictions to. Say if you're sharing your work tablet with the family at home and you want to protect valuable data. Or if you want to stop the kids going crazy with in-app purchases. It's super easy to set up and apply the restrictions you want. Switching between users is as simple as returning to the lock screen, and the owner's profile can be password or pattern lock protected.
Android 4.3 also has a function called TRIM, whereby the system regularly looks for old data points in the index and clears them up if the files they point to have since been deleted. This minefield of extinct data blocks was one of the main reasons the old Nexus 7 suffered from major slow-down over time. But with the OS update your old Nexus 7 should get a fresh lease on life. Of course the new Nexus 7 has TRIM from the start so it shouldn't suffer the slow-down at all.


Now there's been a few problems reported in the new Nexus 7, like GPS location issues, multi-touch weirdness and error messages when trying to update apps in the Play Store. We didn't experience any of these problems while we played with the device but there's enough reports of them to have Google scrambling to fix the bugs.
As far as battieries go, the new model actually has a smaller battery capacity than the older model: from 4325 mAh to 3950.. This shouldn't be a problem however as improved software integration should see a healthy shelf-life from the new model's battery pack. The smaller battery has also helped the new Nexus 7 come in 50 grams lighter than the 2012 model. 


So what does the new Nexus 7 cost? There's three options: $229 for the 16 GB model with WiFi, $269 for the 32 GB model with WiFi and $349 for the 32 GB version with WiFi and LTE, aka 4G.
While I previously said there's not too much in the way of improvements from the old Nexus 7 to the new (especially if you're perfectly happy with your old model) to warrant the upgrade, now that I've seen that extra resolution and improved graphics capability I have to say I'm possibly a convert.
Read More » No comments

Popular Posts

Labels